Showing posts with label DIY. Show all posts

I Remade my Dream Designer Dress!!

Monday, July 6, 2020

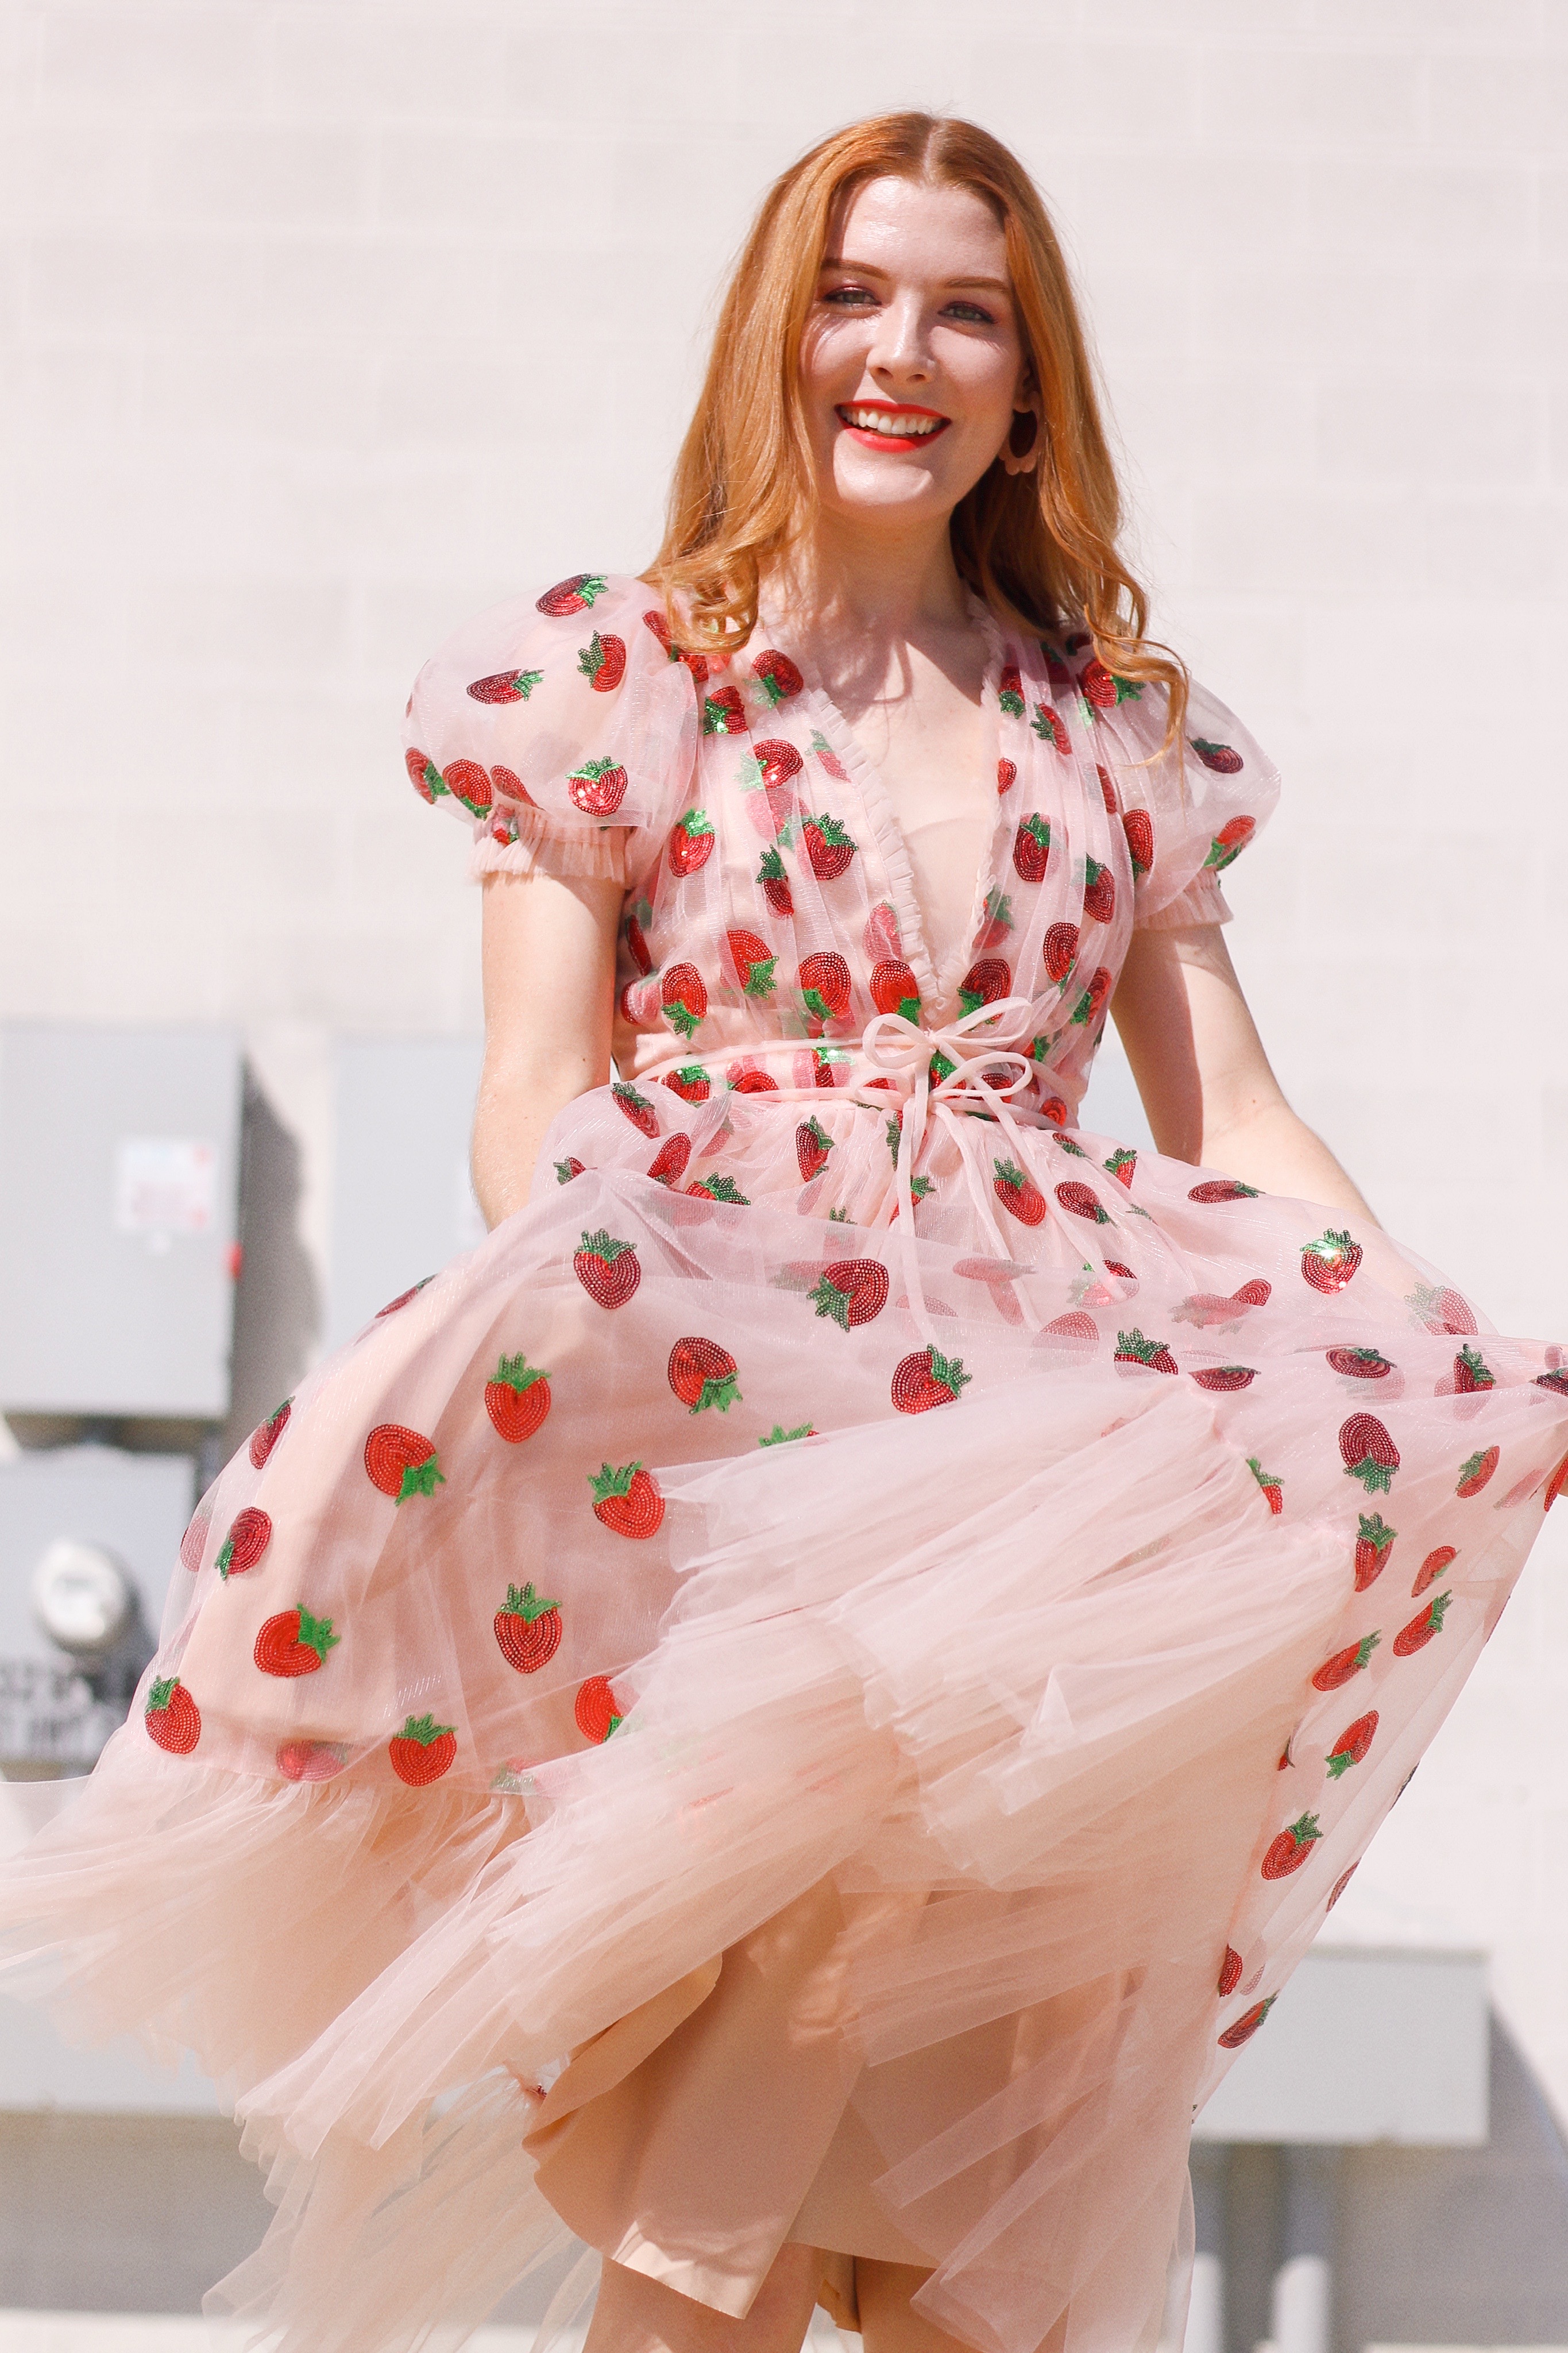
Original Designer                 vs.                My Rendition

At the start of Quarantine (back in March) I threw myself back into sewing and extending my knowledge of design and sewing techniques. I have created MANY THINGS since then, but my favorite project has definitely been recreating one of my dream dresses, this Strawberry Tulle dress, from the New York designer Lirika Matoshi. 
I have been following this designer on Instagram for about a year and have always loved all the dresses, especially the strawberry tulle one, so I decided to try and make it myself. This was definitely a project a bit outside my comfort zone since I had never worked with tulle or sequins before, but it ended up being easier than I thought! 
I started my project by making a muslin mock up of the bodice, using pattern pieces I had adapted from my slopper set. After I had worked out the adjustments on my bodice I started on my dress, which involved a LOT of gathering, layering, and problem solving. I ended up using about 5 yards of each tulle fabric and absolutely LOVE how it turned out! 
I filmed a video of my sewing process / part tutorial for this dress, so if you want to see all the details that went into this project, just hop on over to my YouTube! 


Have you ever remade a dress that you saw?
What else should I remake?

- Madison

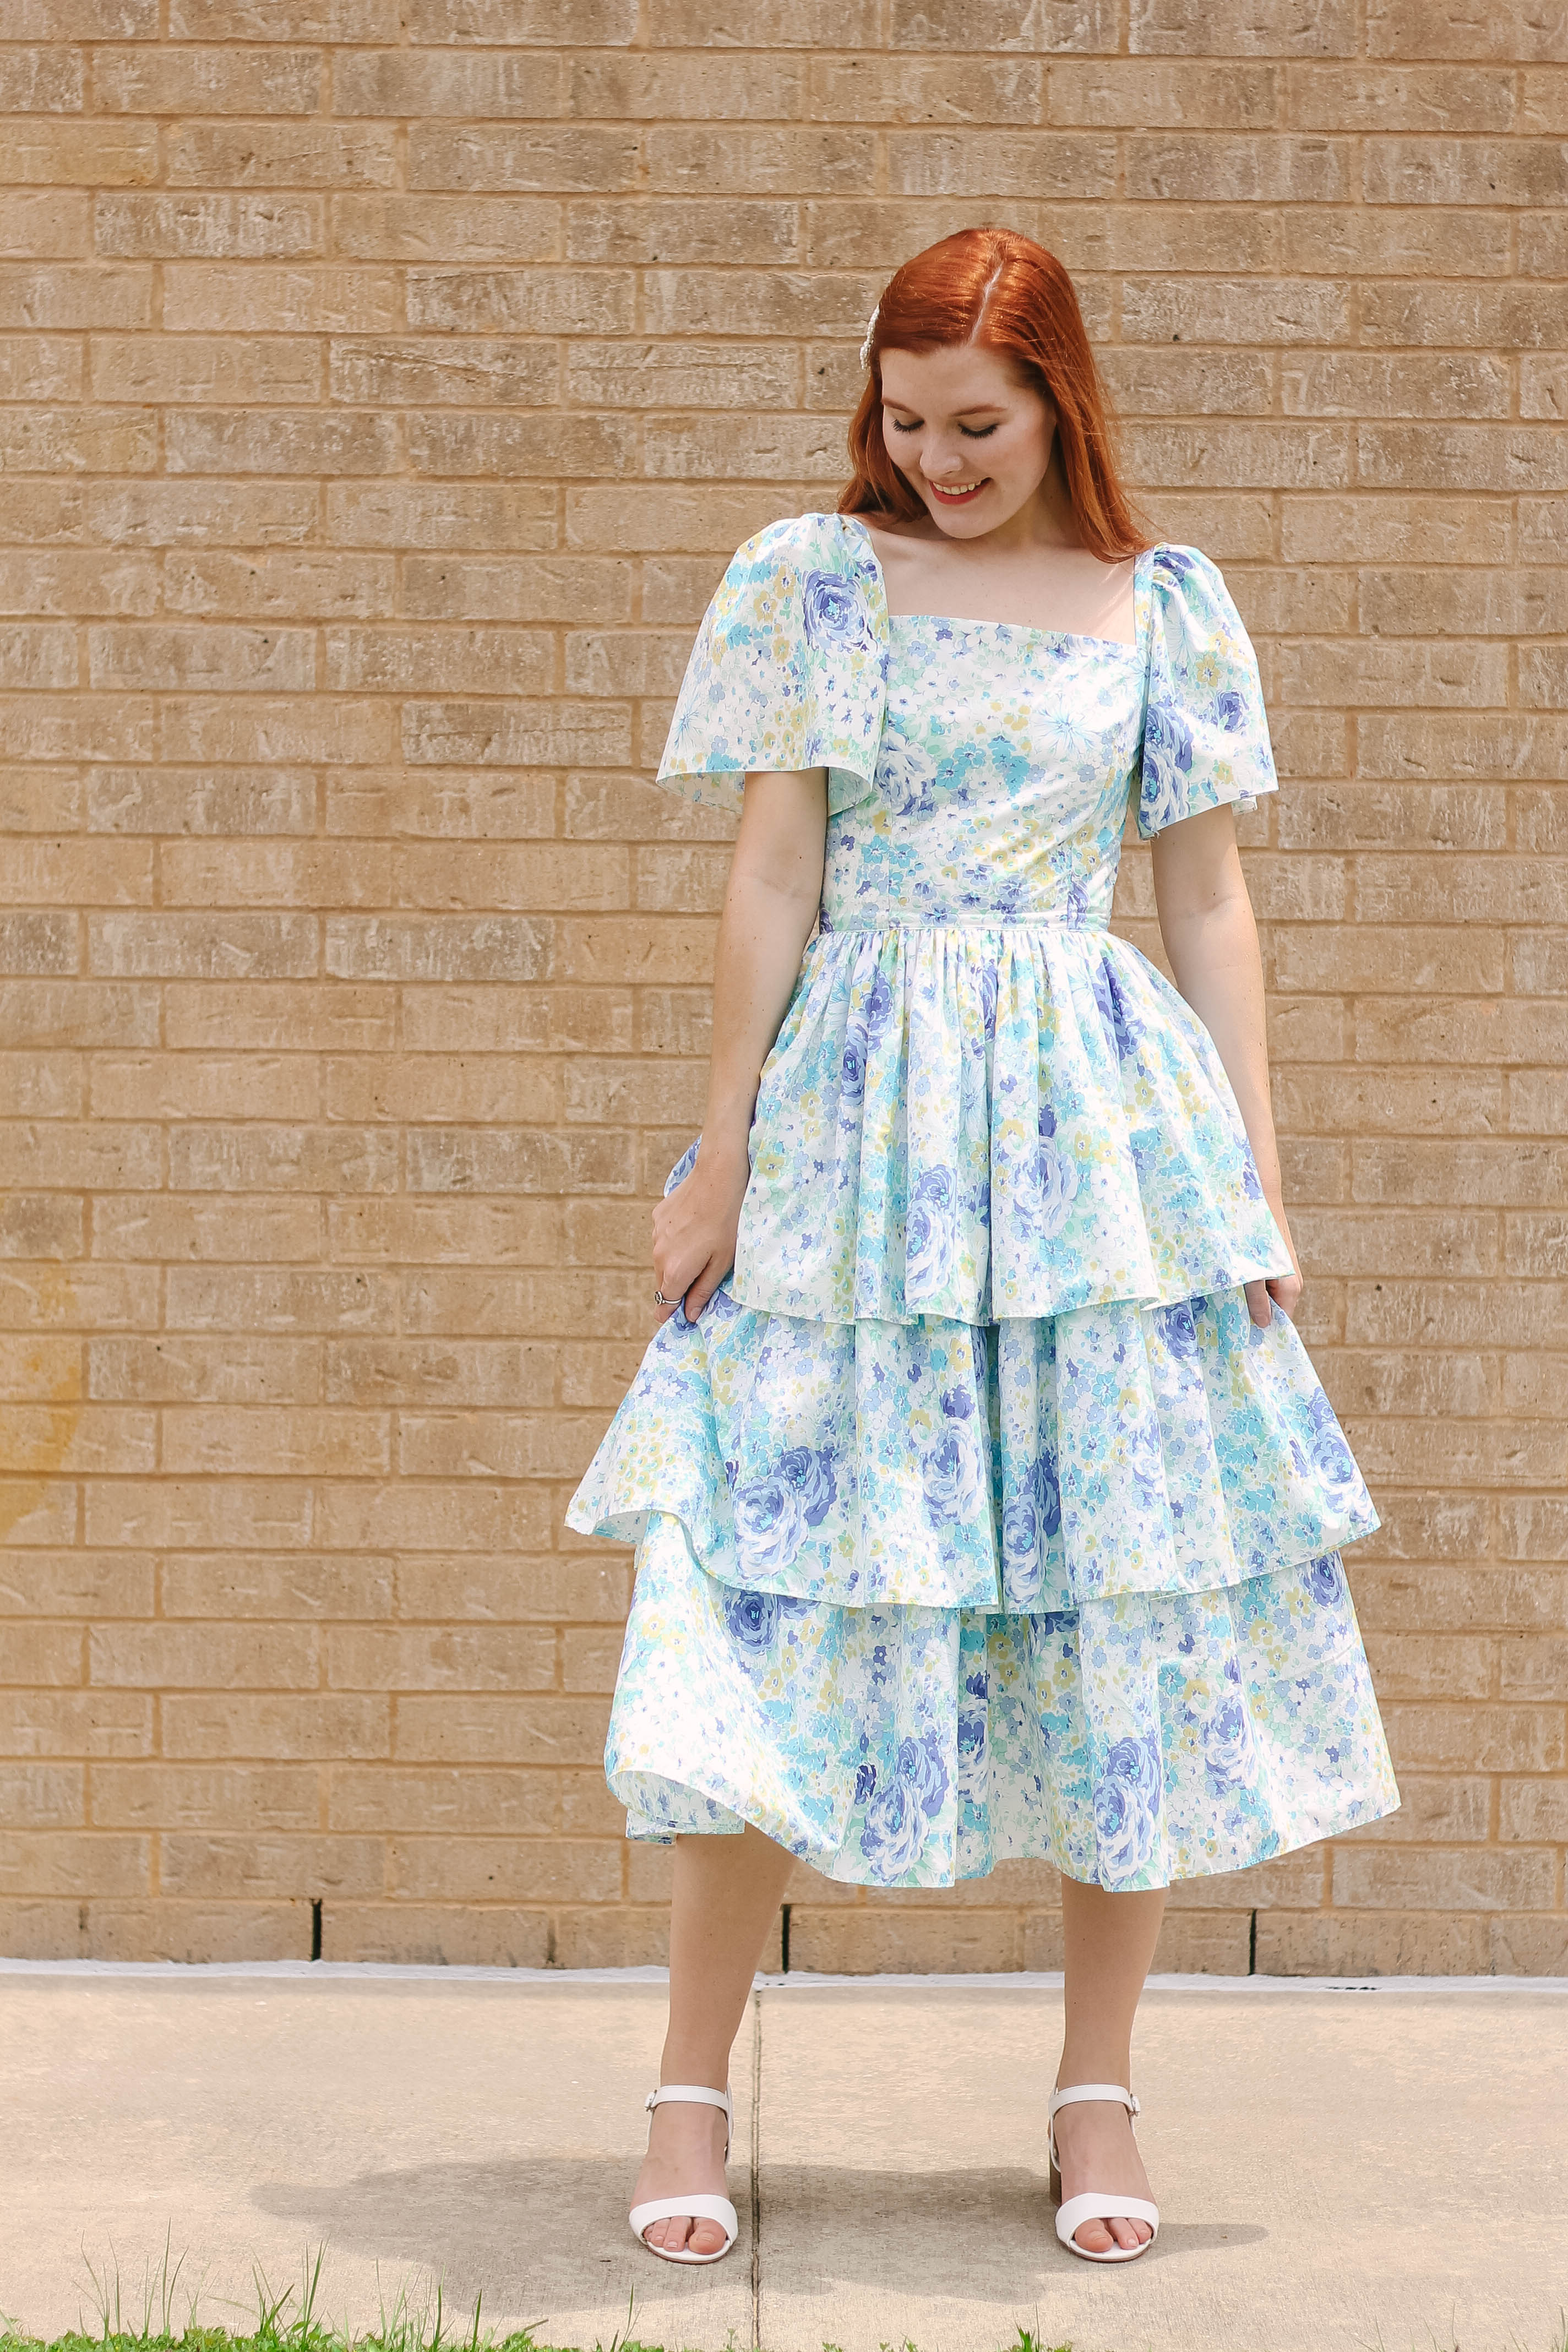
I Made A Dress Out Of A Bedskirt

Monday, June 1, 2020

Dress: Me Made (watch the tutorial Here)  |  Heels: Boohoo   |  Purse: Thrifted  |  Clips: Wallmart

I'm FINALLY BACK ON YOUTUBE!!! While I have been uploading and sharing my travel Vlogs to Youtube over the last two years, I haven't created any other content. I have been wanting to be more present on YouTube forever, but it took a worldwide pandemic and HOUR locked away in my studio to give me a new idea! 
Since I have been spending most of my time in Quarantine sewing in my garage (yes, my studio is in my garage) I decided it was time to start filming videos of my sewing projects, everything from behind the scenes, tutorials, fashion education, etc. 
My first Sewing Tutorial video is LIVE and I am sharing a fun Recycle & Redesign project, turning a bedskirt into a ruffly dress (the dress in this post)!
My style aesthetic lately has been largely inspired by all things ladylike, ruffly, and romantic and this DIY dress is all of that and more. 
If you want to see how I turned a thrifted Bedskirt into a Floral Spring dress, you can watch my video on Youtube or below!


Have you ever made a dress out of a bedskirt?

Would you want to see more sewing videos?

- Madison

Spring Trend: DIY Velvet Bows

Saturday, April 1, 2017


If you haven't noticed, BOWS are kind of all the rage this season and I'm not complaining at all because bows are one of the cutest, most versatile, and feminine accessories to ever be created! With that being said, I thought you all would enjoy a fun and easy DIY tutorial on my process of making velvet bows. Since bows really are so versatile I will show you 3 different sizes and styles that I have been loving that you can easily make for yourself. 

What you will need:
Velvet Ribbon - 1" width and 1.5/2" width
Hair clips - black or silver (hobby lobby)
Hot Glue Gun low temp 
Sewing needle
Thread to match your ribbon
Scissors 


Are you a fan of bows?
Do you think you will try your hand at making some for yourself?

-Madison

As Seen On My Blog

Saturday, February 25, 2017

Skirt: Thrifted
Shirt: Vintage
Sweater: Thrifted + DIY
Tights: Old Navy
Shoes: Target
Purse: Melie Bianco


I LOVE having a blog, and being a blogger has truly become a HUGE part of who I am on a day to day basis. I find myself thinking like a blogger when I reach for my phone to take a picture of my ice cream cone, make note of a perfect photo shoot location, or immediately start planing an outfit/post based off of the dress I found while shopping. However, with that being said, I have discovered a different side to blogging that at times is hard for me to wrap my head around, and with that, it is the realization of being visible. 

That might sound weird, but I have always been the girl who preffered to be in the background if I had a choice.....I am a behind the scenes kind of person most of the time, but as a blogger I never realized how visible I would become to people. This might sound weird, but people actually see me now (okay, that does sound weird...) and see my life! I started blogging to share my loves and interests with people but I never expected to be recognized so much for it by the people around me....Okay, so yes, being a blogger is who I identify as, but it has also become a definition and label that people place on me after they learn about it. It becomes even more obvious when they exclaim "Oh my gosh I love what you are wearing! You always look so cute!" Truthfully, I do love getting compliments, but I am the worst person in the world at responding to compliments because to me I am just an ordinary person who does what she loves and doesn't deserve to be elevated by those around her or seek out attention. However, when people voice such sweet compliments I feel as if they often see me as a super talented person who is kind of "famous" to a degree and I often feel like they have elevated me to a level of "perfection" in their eyes.....a level that I don't place myself on or even see myself.  

Maybe the though of being visible and seen for who I am with all of my interests and talents isn't a bad thing, but sometimes I feel like I don't deserve the attention or praise. I do what I do and I am who I am because that is the best version of myself and a version I happen to LOVE! I don't try to be "perfect" or "the best" or an "over achiever" but so often those are the labels people give me. Thus, as a blogger, my life is more on display than it used to be, and maybe because of that I actually get a glimpse of seeing myself through others eyes. Sure, it's still weird when I meet people and they tell me they follow me on Instagram, or they comment in person on my latest post, or even when they look at my blog or Instagram for the first time (in front of me no less) and then somehow change their whole perspective of who I am. 

I think this whole idea of being VISIBLE stems from the fact that I am typically a pretty private and reserved person, but as a blogger I seem to present a different side of myself and open up. Being a blogger and calling this space my own is almost like living inside a room surrounded by windows for anyone to peak inside, sure they have curtains in which to keep certain things to myself, but most of the time they are open for the view. So whoever you are, wherever you are from, just know the fact that you care about my life, me, and what I love means THE WORLD to me......but just know I am far from perfect....no matter what my life might look like on my Blog or Instagram I am still me :)

______________________________________________

As for the outfit in this post, let's just say that it was very Noelle Downing inspired, plus I kind of created my own DIY version of her "As Seen On My Blog" sweater which might just be the greatest thing EVER! Interesting fact, I didn't want to pay/buy the original of this sweater so I decided it would be "pretty easy" to stitch myself; much to my surprise that it would only be 3 Twilight's (as in the movies) later when I finally finish it, but I am so excited with how it turned out! 

Do people ever see you for someone you don't see yourself as?
What are your thoughts on being visible? 

-Madison

DIY Flower Crowns

Monday, June 6, 2016

Apparently when you post a picture on Instagram of the flower crown you are making you must then post a DIY on the blog about it! I wasn't originally planning to write a post on my flower crown making but after the interest on Instagram I thought "Why Not?" and off to taking pictures of my process I went with my sister looking inquisitively at me and my tripod propped up on a kitchen chair beeping with the self timer.....tis a bloggers life:)
This past Saturday, my sister, myself, and my best friend worked a wedding up at my church (which was oh so much fun!) and the reception just happened to have the most lovely and natural looking vertical flower arrangements on the tables. Well, as the obsessed flower girl that I am I asked what was to be done with the flowers after the reception and discovered to my delight that we could take some of them home with us! Thus, the flower arrangements provided me with a huge assortment of flowers and greenery to fill my flower crown making desire and ideas.......
I have never actually watched a tutorial on making a flower crown, I just kind of came up with my own method and it works splendidly! Therefore, you will need a pair of scissors, a roll of copper wire (the kind found in the jewelry making section) and a decent amount of flower buds and greenery to mix in contrast. 
Step #1:
Pick a single flower to start with and either wrap the wire around the stem or gently stick the wire up the flower step so that it sticks out about 3 inches at the top. Do not cut the wire as it will be used at the end. 
Step #2:
Now is the time to let your creative juices flow freely through your brain waves and out your fingers! Now you simply start choosing different flowers and greenery to overlap the previous flower on the crown and you gently wrap the wire around the flower stem 2 to 3 times, securing it on top of the flower in front of it. 
Step #3:
I find that it is easier to leave the flowers a 2 to 3 inch stem until you have secured it onto the crown and then you can trim what sticks out. This way there is more to overlap on the previous flower's stem and thus create a nice support besides the wire. 
Step #4: 
Continue to add flowers, buds, and greenery to the crown that is taking shape as you overlap the stems and wrap the wire around the ends, securing them in place. 
Step #5:
I like to alternate colors of the flowers throughout the crown to create balance and then add touches of greenery every 3-4 flowers as a contrast to the bright colors. Depending on which flowers you have chosen to use your crown might simply be a crown of colorful flowers without greenery, but that is where you have "creative license" and the choice is totally up to you! 
Step #6:
As you near the end of the crown, take a moment to hold what you have created so far around your head, measuring its size and determining whether or not you need to add a few more buds. 
Step #7:
Once you measured the flower crown's size in relation to your own head, snip the wire end leaving 3 inches like the other side. Now all you have to do is overlap the beginning flower with the end of the crown and wrap the wire underneath the buds, securing it out of sight. (be careful to tuck and pointed ends under)

I hope you all enjoyed this DIY......maybe there will be more DIY posts in the future here, but for now enjoy the sheer beauty of flowers and flower crowns! Now it is your turn to put your creativity to work and make your own :) If you try my method or even create your own I would love to see what you come up with so post it on your social media account (if you have one) and tag me!

P.S. The best part about flower crowns is you can always let them dry out and then you will have a dried flower crown forever! 

Do you like my method for making a flower crown?
Have you ever made a flower crown before?

-Madison