Showing posts with label Creative. Show all posts

I Remade my Dream Designer Dress!!

Monday, July 6, 2020

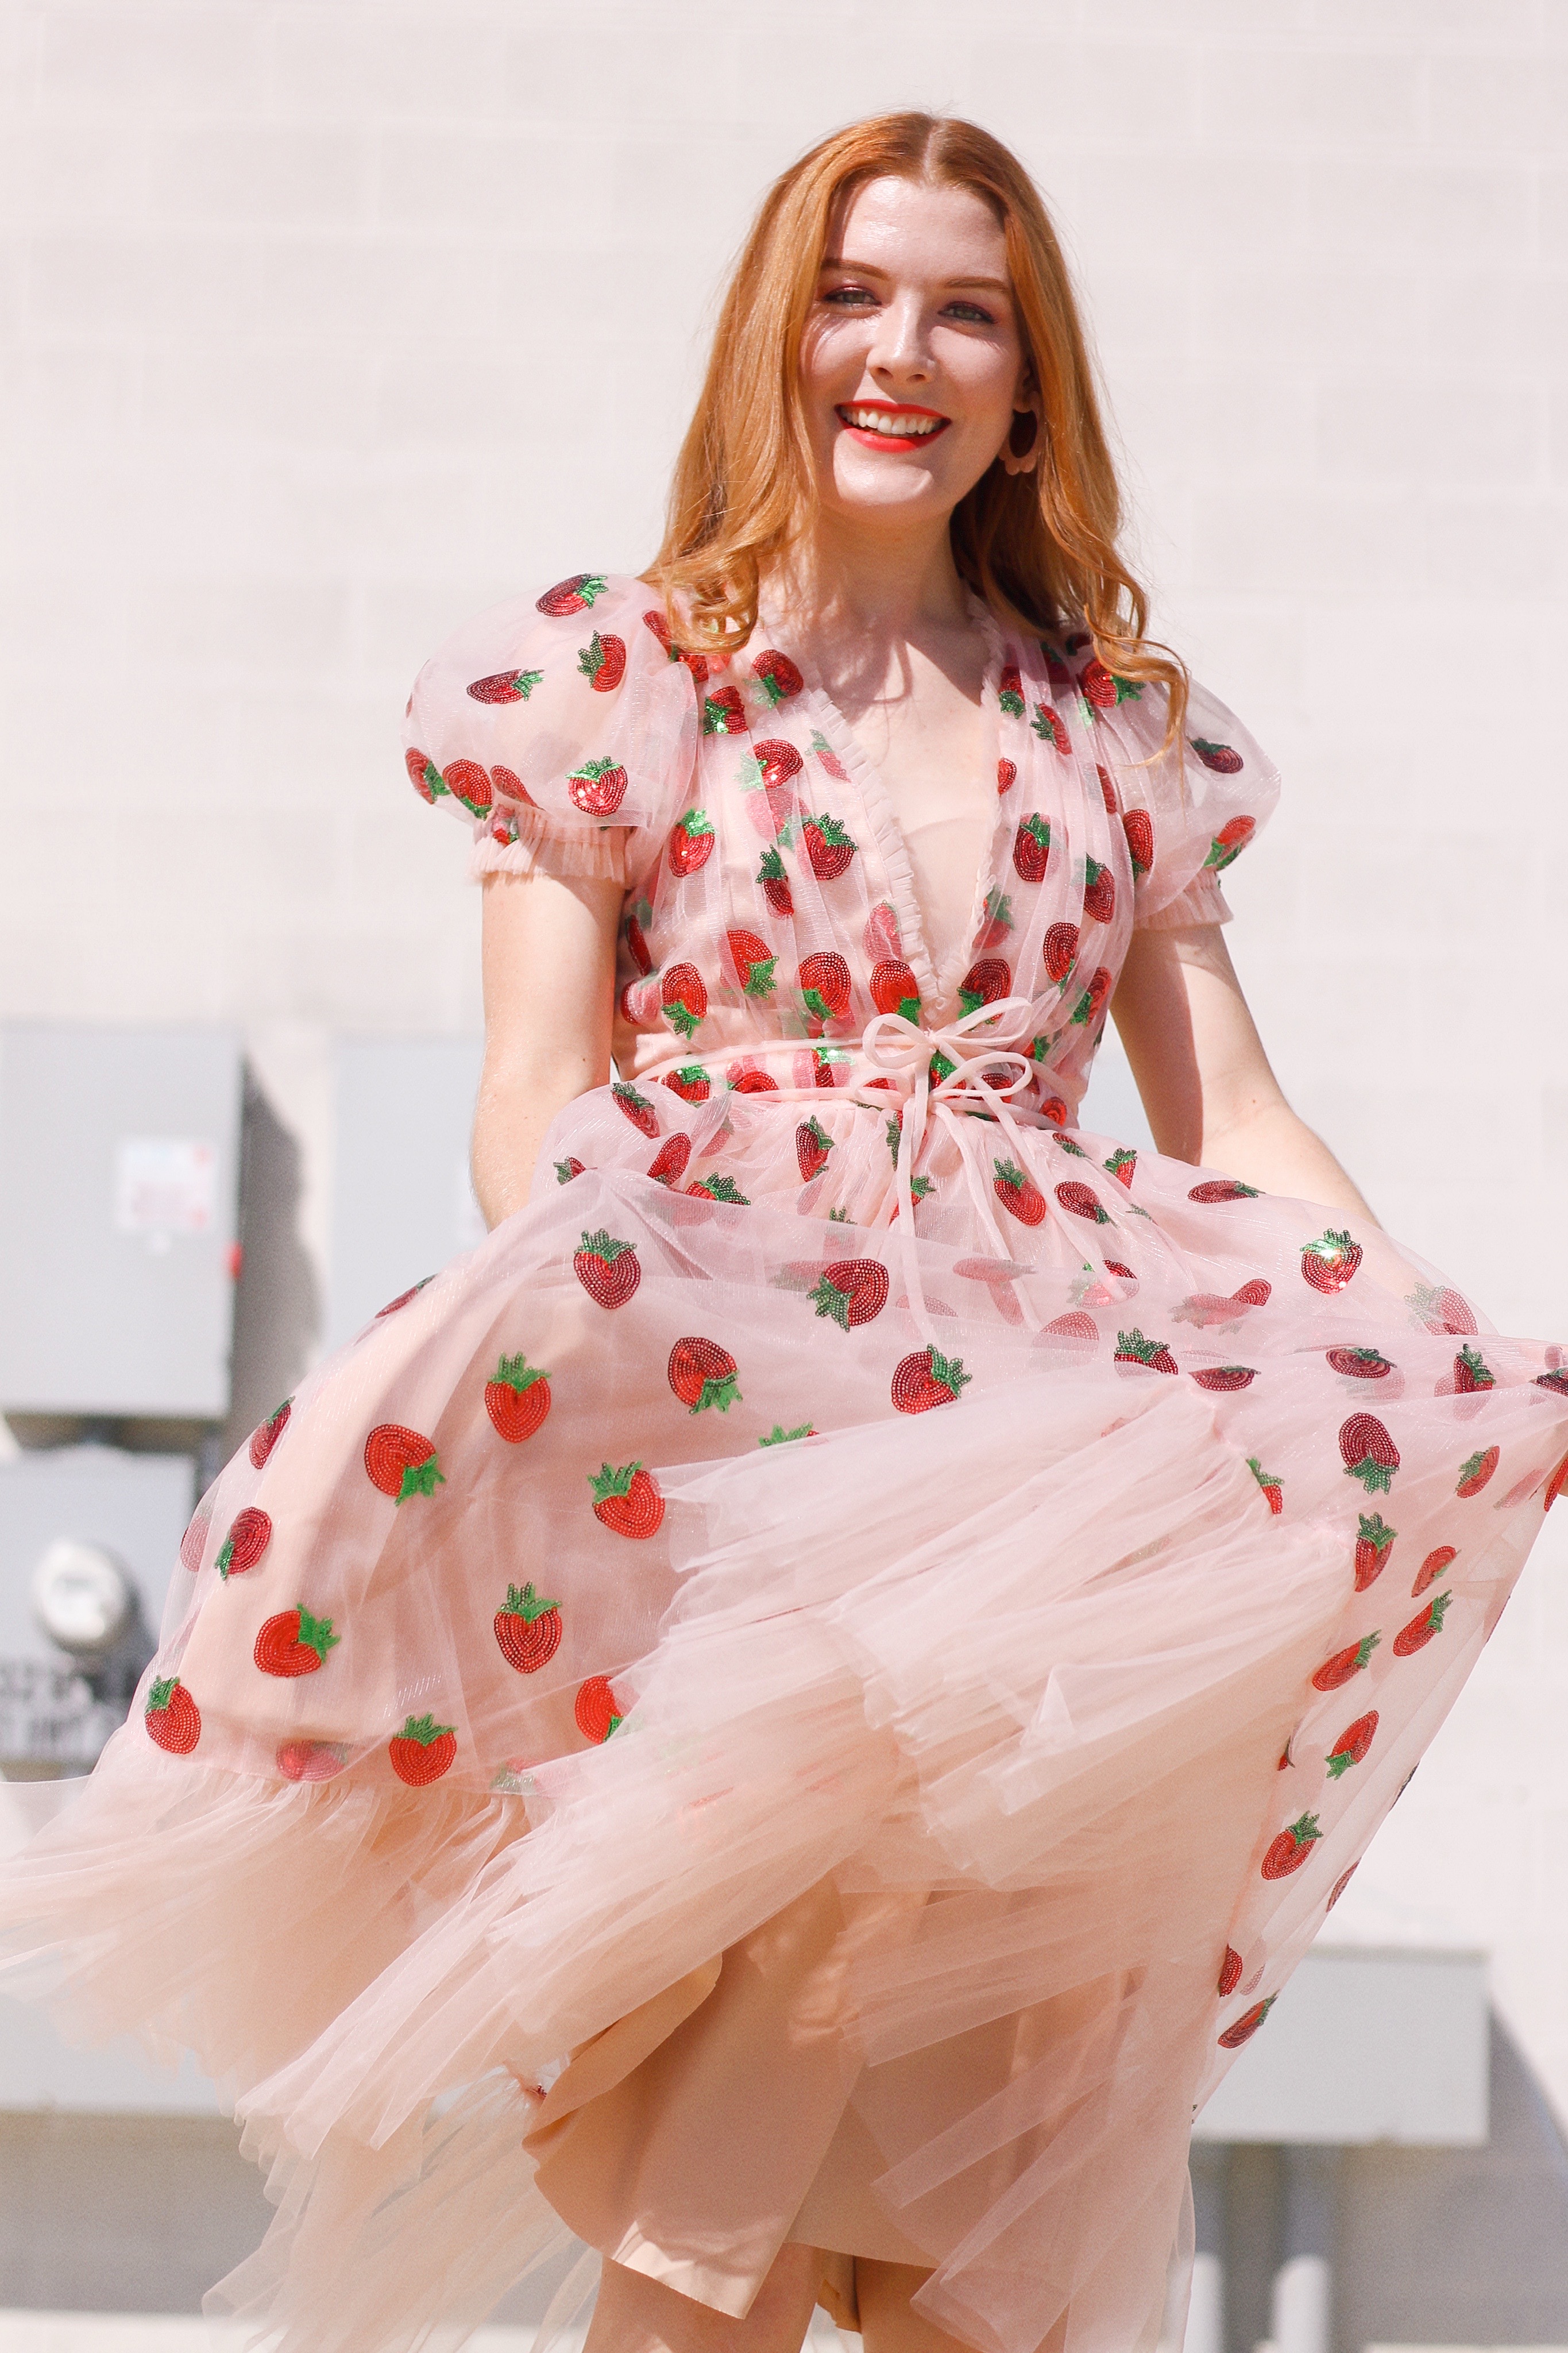
Original Designer                 vs.                My Rendition

At the start of Quarantine (back in March) I threw myself back into sewing and extending my knowledge of design and sewing techniques. I have created MANY THINGS since then, but my favorite project has definitely been recreating one of my dream dresses, this Strawberry Tulle dress, from the New York designer Lirika Matoshi. 
I have been following this designer on Instagram for about a year and have always loved all the dresses, especially the strawberry tulle one, so I decided to try and make it myself. This was definitely a project a bit outside my comfort zone since I had never worked with tulle or sequins before, but it ended up being easier than I thought! 
I started my project by making a muslin mock up of the bodice, using pattern pieces I had adapted from my slopper set. After I had worked out the adjustments on my bodice I started on my dress, which involved a LOT of gathering, layering, and problem solving. I ended up using about 5 yards of each tulle fabric and absolutely LOVE how it turned out! 
I filmed a video of my sewing process / part tutorial for this dress, so if you want to see all the details that went into this project, just hop on over to my YouTube! 


Have you ever remade a dress that you saw?
What else should I remake?

- Madison

Spring Trend: DIY Velvet Bows

Saturday, April 1, 2017


If you haven't noticed, BOWS are kind of all the rage this season and I'm not complaining at all because bows are one of the cutest, most versatile, and feminine accessories to ever be created! With that being said, I thought you all would enjoy a fun and easy DIY tutorial on my process of making velvet bows. Since bows really are so versatile I will show you 3 different sizes and styles that I have been loving that you can easily make for yourself. 

What you will need:
Velvet Ribbon - 1" width and 1.5/2" width
Hair clips - black or silver (hobby lobby)
Hot Glue Gun low temp 
Sewing needle
Thread to match your ribbon
Scissors 


Are you a fan of bows?
Do you think you will try your hand at making some for yourself?

-Madison

DIY Flower Crowns

Monday, June 6, 2016

Apparently when you post a picture on Instagram of the flower crown you are making you must then post a DIY on the blog about it! I wasn't originally planning to write a post on my flower crown making but after the interest on Instagram I thought "Why Not?" and off to taking pictures of my process I went with my sister looking inquisitively at me and my tripod propped up on a kitchen chair beeping with the self timer.....tis a bloggers life:)
This past Saturday, my sister, myself, and my best friend worked a wedding up at my church (which was oh so much fun!) and the reception just happened to have the most lovely and natural looking vertical flower arrangements on the tables. Well, as the obsessed flower girl that I am I asked what was to be done with the flowers after the reception and discovered to my delight that we could take some of them home with us! Thus, the flower arrangements provided me with a huge assortment of flowers and greenery to fill my flower crown making desire and ideas.......
I have never actually watched a tutorial on making a flower crown, I just kind of came up with my own method and it works splendidly! Therefore, you will need a pair of scissors, a roll of copper wire (the kind found in the jewelry making section) and a decent amount of flower buds and greenery to mix in contrast. 
Step #1:
Pick a single flower to start with and either wrap the wire around the stem or gently stick the wire up the flower step so that it sticks out about 3 inches at the top. Do not cut the wire as it will be used at the end. 
Step #2:
Now is the time to let your creative juices flow freely through your brain waves and out your fingers! Now you simply start choosing different flowers and greenery to overlap the previous flower on the crown and you gently wrap the wire around the flower stem 2 to 3 times, securing it on top of the flower in front of it. 
Step #3:
I find that it is easier to leave the flowers a 2 to 3 inch stem until you have secured it onto the crown and then you can trim what sticks out. This way there is more to overlap on the previous flower's stem and thus create a nice support besides the wire. 
Step #4: 
Continue to add flowers, buds, and greenery to the crown that is taking shape as you overlap the stems and wrap the wire around the ends, securing them in place. 
Step #5:
I like to alternate colors of the flowers throughout the crown to create balance and then add touches of greenery every 3-4 flowers as a contrast to the bright colors. Depending on which flowers you have chosen to use your crown might simply be a crown of colorful flowers without greenery, but that is where you have "creative license" and the choice is totally up to you! 
Step #6:
As you near the end of the crown, take a moment to hold what you have created so far around your head, measuring its size and determining whether or not you need to add a few more buds. 
Step #7:
Once you measured the flower crown's size in relation to your own head, snip the wire end leaving 3 inches like the other side. Now all you have to do is overlap the beginning flower with the end of the crown and wrap the wire underneath the buds, securing it out of sight. (be careful to tuck and pointed ends under)

I hope you all enjoyed this DIY......maybe there will be more DIY posts in the future here, but for now enjoy the sheer beauty of flowers and flower crowns! Now it is your turn to put your creativity to work and make your own :) If you try my method or even create your own I would love to see what you come up with so post it on your social media account (if you have one) and tag me!

P.S. The best part about flower crowns is you can always let them dry out and then you will have a dried flower crown forever! 

Do you like my method for making a flower crown?
Have you ever made a flower crown before?

-Madison

MASTERPIECE

Saturday, April 9, 2016


Skirt: Thrifted 
Shirt: Target
Shoes: Cato's (this season) 
Purse: Vintage (COACH)
Necklace/Earings: Walmart 
Lipstick: Rimmel London Katie 01

"The greatest masterpieces were once only pigments on a palette." 
- Henry S. Hoskins 

I often look at portraits and masterpieces skilfully created and painted by the greats and wonder what was going through their mind. What was the spark inside of them that inspired such beautiful works of art? However, I have only to look at the world around me and see my reflection in the mirror to know exactly what must have been going through the artists mind! Art is brought forth by ideas, by passion, inspiration, the need to fill a void in life and by love of the artist for the art. In order to be art the artist must love it dearly, otherwise he will start over again until it is perfectly as he imagined in his head. Other times the artist might create something that he is not that proud of or different from the norm but he will let the onlookers be the judge. 

Then again, there are times I look at a masterpiece, or so called masterpiece simply because of the name that is scribbled in the bottom corner, and wonder "What was the artist thinking?" There are those works of art that in themselves are bizarre, completely uncaptivating, full of strangely sized people and misproportionate objects. When I look at those works of art, that in my own mind seem completely worthless or void of true talent and mastery, I realize that the artist must have known what he is doing and evidently so if the piece is in a gallery.....it might not be a work that everyone likes, but the artist loves it and there are others that might appreciate it to. 

The thing is, we are just like all of those great and valuable masterpieces that line the walls in museum gallery rooms for all eyes to see. We are masterpieces in and of ourselves. Granted, we might think our lives are a complete mess, that the artist simply mixed all the paint together and threw it on a canvas, but to the artist that mixed up painting was inspired by passion and love. To the artist that piece is a masterpiece and priceless even when others do not always think it is worth looking at. Just because an ancient statue has no arms doesn't mean it is not perfect. Just because a portrait of someone is geometrically out of proportion and oddly ugly doesn't mean the artists didn't see a beautiful work of art in and of itself staring back at him with eyes full of life! You are a masterpiece created by the ultimate creator and most famous and well known artist in the ENTIRE WORLD!! 

You are valuable because of who you are....because of your height, color, size, likes, dislikes, smile, frown, laugh.....everything! The creator of the universe created you out of his favorite colors and blended them to perfection until he captured the image in his mind.....he created you as a work of art because you were inspired by his passion and abounding love! You are part of a life long masterpiece being painted in the timeline of existence every day.....the signature on your life is all that matters and is all that should ever define you! The colors of your painting, the size of your figure, the expression that tells who you are......those are not what defines your masterpiece, it is the artist behind it! Therefore, live life knowing you are one of a kind....you are valuable.....you are treasured......and your life is a work of art because the artist painted it with love. 

_____________________________________________________________

Well that sure turned out to be a bit long, but it was soooooooooooo worth it! I had those words floating around in my head all this week and I couldn't wait to get them down into sentences. These pictures were taken a few weeks ago over my spring break. You might remember me talking about visiting the art museum and that is where these were taken! This day was actually the maiden voyage of my 50mm 1.8 camera lens and boy did it make all the difference when capturing these images inside.:) 

This day was such fun, spending it with two of my dear friends (pictures above), my mom, and my sister. It had been around 7 years since I had visited the art museum and it was so lovely going back and basking in the portraits and paintings of all the great artists! 

Of course, knowing that I would be visiting the art museum meant I was brainstorming for a week on what ensemble I should wear. Therefore, since the art museum is located in the elegant and high end portion of the museum district of the city (Houston) I thought it was the perfect occasion to embrace my inner chic city fashionista with a simple and classic look inspired by life in the uptown part of the city. I chose to pair my midi classic pleated black skirt with an even more classic white and black/grey striped quarter length shirt. To complete the look I chose to wear my tan pointed toe sued ankle buckle shoes and my vintage coach purse. All in all I loved how the look came together and it went so well with all of the paintings :) 

What are your thoughts on your life being a masterpiece? 
Have you ever been to an art museum? 
What would you wear to an art museum? 

-Madison


//DIY// Shipper Shirts

Wednesday, November 4, 2015


Hello all you lovely readers! It appears time has gotten away from me again as I didn't manage to take outfit pictures yet this week. Life has slowed down a bit and yet all of my plans for posts have not yet happened. I must say I have some exciting ideas for posts coming up, including a very wonderful review! On top of everything, Betty (my camera) wasn't working yesterday and I was freaking out a bit thinking she was broken, however all is well now:) 
Nonetheless, I thought I would bring you all something different today.....a DIY! Now, as much as I would have loved to put together a step by step process for this DIY I am afraid you all will have to simply settle for the final projects. 
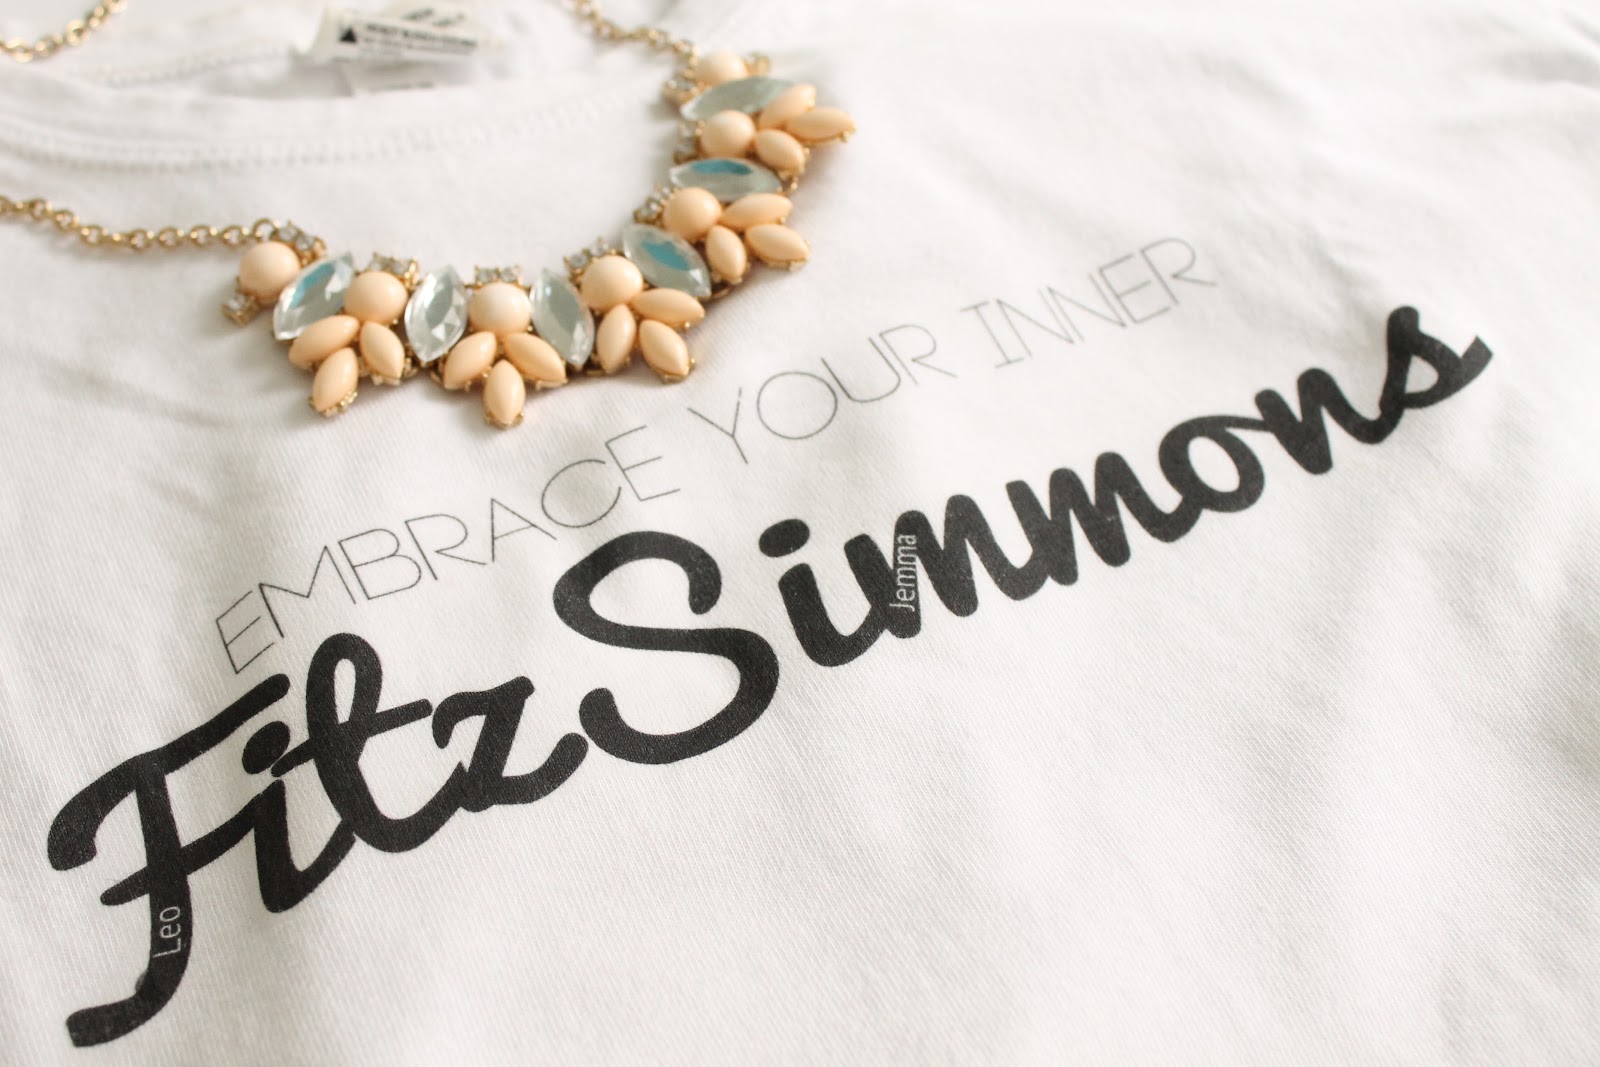
For those of you who might know, I am a big Agents of Shield fan. This being said, I am an even bigger Fitzsimmons shipper.......maybe even a little obsessed !!! This season has been quite dramatic for Fitzsimmons and has had me on the edge of my seat a number of times, but I will leave it at that so as not to give to much of Season 3 away. However, as a HUGE fan of Fitzsimmons I thought it only fitting to make a few (I actually have 3) shirts to show my support!

I found a shirt with this saying on pinterest and absolutely fell in love with it! I love that the last names that make up the ship "Fitz" and "Simmons" have the first names in white on one of the letters. 
(I used the website Canva to create the logo.) 
As always you can never go wrong with a statement necklace and a Tshirt!
I have found that the white shirt goes quite well with my washed out denim button up. 
I couldn't very well make a DIY shipper shirt without a picture of my two favorite people:) This is a picture from season 1 and I have always loved how it shows Fitz and Simmons relationship. 
The grey shirt goes very well with my red flannel shirt! This has been my go to combination when I just want something comfy!
FYI.....if you are wondering how I made these shirts (obviously) I used logo maker paper from Hobby Lobby that you print your logo from the computer onto. To make the logo I used googled clipart and then Canva for the text & creations of the cohesive design. 
I will leave this post with a few favorite Fitzsimmons gifs and head off to watch this weeks episode....who knows what to expect!


Are you a Fitzsimmons fan?

Have you seen any of season 3 yet?